From Design to Protection: The Making of a Vinyl Car Wrap
How are Vinyl Car Wraps Printed?
Car wraps have become increasingly popular over the years, with more people opting for vinyl car wraps instead of traditional paint jobs. Car wraps offer several advantages over traditional paint jobs, including cost-effectiveness, customization, and protection against wear and tear.
But have you ever wondered how vinyl car wraps are printed? In this blog post, we’ll explore the printing process of vinyl car wraps.
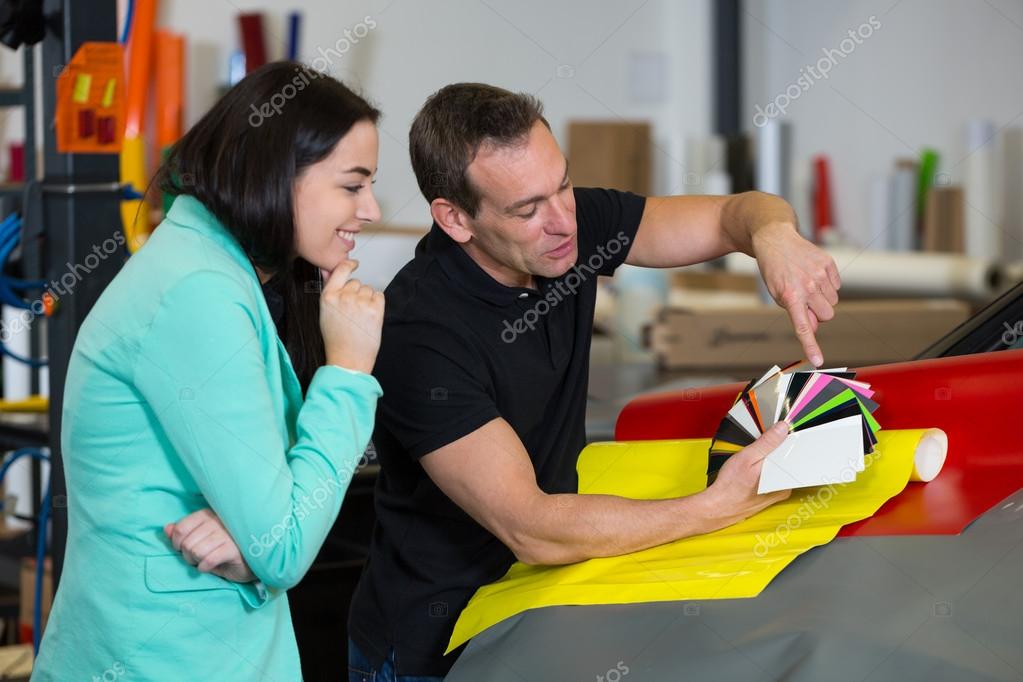
Table of Contents
Introduction
A vinyl car wrap is a large vinyl graphic or decal that is applied to the surface of a vehicle. The vinyl is printed with a design or image and then applied to the vehicle using an adhesive backing.
The printing process for vinyl car wraps is similar to the printing process for other large format graphics, such as banners and posters. However, there are some key differences that make the printing process unique for car wraps.
Designing the Wrap
The first step in the printing process for vinyl car wraps is designing the wrap. The design is typically created using computer software, such as Adobe Illustrator or Photoshop. The design must be carefully created to ensure that it fits the contours of the vehicle and looks great from all angles.
Once the design is complete, it is sent to the printer in a digital format. The printer used for vinyl car wraps is typically a large format printer that can handle the size of the wrap. The printer uses high-quality inks to ensure that the colors are vibrant and long-lasting.
Printing the Wrap
After the design has been sent to the printer, the vinyl is loaded onto the printer. The printer uses a process called four-color process printing to create the design on the vinyl.
The four-color process printing method uses four ink colors - cyan, magenta, yellow, and black - to create a full-color image. The printer uses tiny dots of ink to create the image, with each dot being a different color. By combining these dots in different ways, the printer can create a wide range of colors and shades.
Once the printing is complete, the vinyl is removed from the printer and inspected for quality. Any errors or defects are corrected, and the vinyl is trimmed to the correct size and shape for the vehicle it will be applied to.
Laminating the Wrap
After the vinyl has been printed and trimmed, it is typically laminated to provide additional protection against wear and tear. The lamination process involves applying a clear protective film over the vinyl to protect it from scratches, UV rays, and other types of damage.
The lamination process is similar to the printing process, with the vinyl being loaded onto a laminating machine and the clear film being applied to the vinyl. The laminated vinyl is then inspected for quality and trimmed to the correct size and shape for the vehicle.
Conclusion
The printing process for vinyl car wraps is a complex process that involves several steps, including designing the wrap, printing the wrap, and laminating the wrap. By understanding the printing process, you can better appreciate the artistry and precision that goes into creating a vinyl car wrap.
Whether you’re looking to advertise your business, add a custom design to your personal vehicle, or protect your car’s paint job, a vinyl car wrap is an excellent choice. With the right design and printing process, you can create a wrap that looks great and lasts for years to come.
So the next time you see a car with a vinyl wrap, you’ll know just how it was made!